 How to install WordPress, the most preferred choice for blogging? Installing WordPress is as easy as using it. The entire process of WordPress installation takes less than a few minutes. No struggling with various server settings or fixing codes. Here’s a guide to installing a basic WordPress blog. Read it and you will be ready to install WordPress.
How to install WordPress using Cpanel & Quick Install?
Most web hosting providers give you access to Cpanel where you can manage your hosting account, add new domains and subdomains, create database and email accounts. You can also install certain applications such as WordPress through your web hosting Cpanel. The following is an easy guide on how to install WordPress using one-click installation & Cpanel.
Optional: Before proceeding, get an email account with your domain created. This can be used for the email option when creating a new WordPress blog.
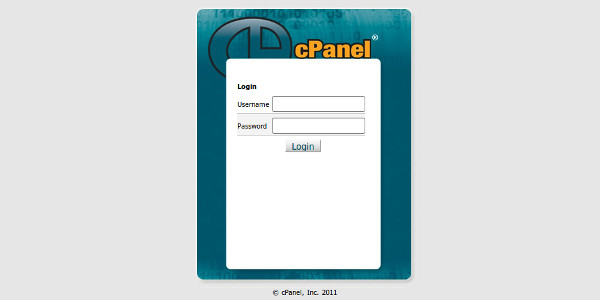
1. Log in to the Cpanel of your hosting account. Use the link provided by your web hosting company. You can also log in to the Cpanel by entering your domain name in the web browser and then adding “/cpanel” at the end. (http://example.com/cpanel)

2. You will be asked for username and password. Use your hosting account username and password to gain access to Cpanel.
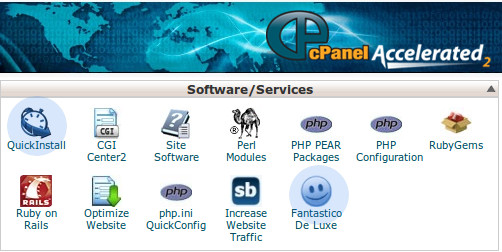
3. On the Cpanel page, locate the icons which says “Quick Install”. You can use it to quickly install WordPress.

4. Once you click on the Quick Install icon (or the other icon), you will be taken to another page where you will have a list of website scripts that you can install using the automated system. Locate the “WordPress Installation” (or WordPress in the sidebar) option and click on it.
5. Enter the details in the next page and follow the instructions that appear. Your WordPress installation is complete.
6. You can now manage your WordPress blog by going to the WordPress dashboard by adding “/wp-admin/” at the end of your domain name on which WordPress has been installed. (http://example.com/wp-admin/)
Enter your WordPress username and password that you entered while installing WordPress. Customize your blog with theme and plugins before you start blogging.
How to install WordPress manually?
If you want more control while installing wordPress, you can do it manually using FTP client such as Filezilla. We will still need access to Cpanel for creating database for our new WordPress installation. Here is how to install WordPress manually.
- Check that your web host has the minimum requirements to run WordPress.
- Download the latest version of WordPress.
- Unzip the downloaded file to a folder on your hard drive.
- Set up your database: WordPress uses MySQL database. The process is different for each Webhost. So I will just tell you that you need to be ready with the database name, username, password and database host. If you have trouble in this, you need to check with your hosting company.
- Use FileZilla (or any other FTP client) to connect to your webhosting space. To connect to your web server using Filezilla, go to File -> Site Manager and add a new site. You will have to enter the FTP address for your web server. It’s generally ftp.yourdomain.com or just yourdomain.com. You will also need your FTP username and password. Apart from this, your hosting company will also tell you what server type or FTP protocol needs to be used for FTP access. All of it should be there in your hosting dashboard or the mail sent by them. (Again, if you have any trouble, get in touch with your webhost.)
- Upload the contents of the unzipped WordPress folder to the desired directory on your Web server. The left pane of Filezilla shows the local directory (that’s on your computer). Browse to the WordPress folder on your hard drive. The right pane of Filezilla is the webserver diresctories. Browse to the directory where you want to install WordPress. Now select all files and folders (Ctrl+A) in the local WordPress directory and drag-and-drop them in the desired webhost directory present in the right pane. Filezilla wil start uploading the files and alert you when it’s done.
- Open a Web browser (such as Firefox or Google Chrome) and open the URL of your WordPress blog or site being installed. You will be greeted by a WordPress error page with a large button saying “Create a Configuration File”. Follow the instructions that appear on the screen. Enter your database details (and a special prefix if you want to install multiple WordPress blogs using one database). You will be done in less than a minute.
- If the WordPress cannot automatically configure itself, go to the web directory where it is being installed. Locate the file named wp-sample-config.php. Rename it to wp-config.php and open it for editing. Manually add your database details at the designated places. Get a secure password for your Secret Key and paste it at the marked place. Now open the site in browser and customize it.
This is all about how to install WordPress blog. I have tried to provide an easy-to-understand guide to installing wordPress. Howerver, if you still face any trouble during WordPress installation, don’t hesitate to leave a comment or shoot me a mail. You might also want to read the WordPress installation guide on WordPress.org.
