
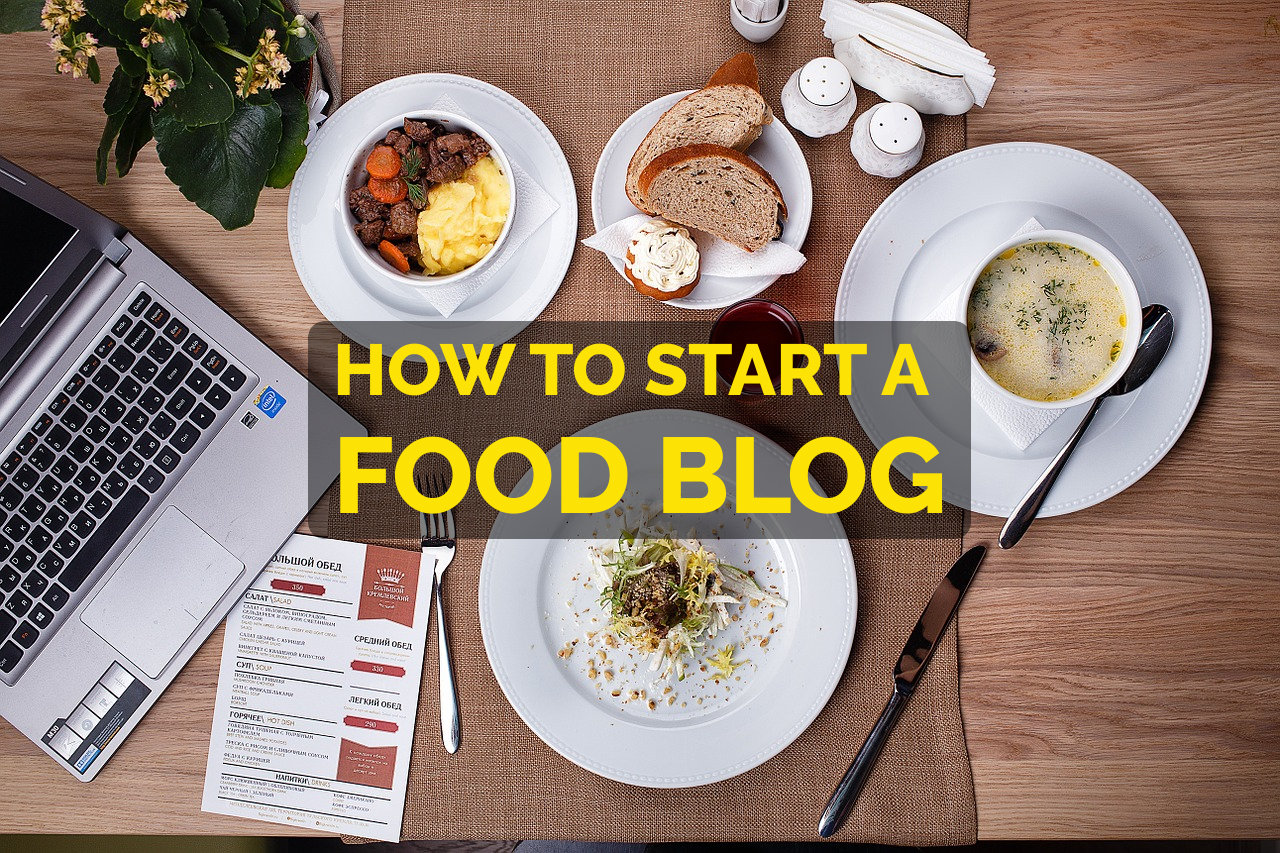
Do you want to start a professional food blog without spending any money? How to start a food blog for free? (Updated for 2021 and beyond.)
Most tutorials on the Internet tell you how to start a food blog with self-hosted WordPress. If you are a student or someone from a developing country, an investment of $100 in a blog can be tough. For most people in poor countries, $100 is a significant amount.
In this article, we learn how to start your own blog with FREE hosting. In fact, we are going to use a free Google service to start our food blog. You can start with you near-zero cost food blog. Once you gain some visitors and confidence, invest in your own self-hosted blog.
Try Blogger with a custom domain (register with Godaddy for just $0.99/year). We can use Google’s blogging platform Blogger.com to host our food blog for FREE.
On Specky Geek, we have already discussed in great detail how to start a food blog with a small investment of around $100 in domain and blog hosting. Before you go ahead, read the previous tutorial that describes how to plan your food blog idea, find your specialized areas for food blogging, picking a domain name and installing self-hosted WordPress as your blogging platform.
If you don’t have any money to invest in your food blog, you can still start a blog. Learn how to start a food blog for free using Blogger.com and a custom domain. Start your food blogging journey like a professional without any cost. Here’s a quick overview of how to start your food blog for free.
How to Start a Food Blog for FREE
Too busy to read a lengthy tutorial on how to start your food blogging for free? Here’s quick overview of how to get started with food blogging with any investment.
- Research your niche: Choose your food blog niche and create an outline for initial articles. Find your unique voice to present your articles and blogs in style and stand out of the crowd.
- Set up your blog: Register a domain name (prefer .com) and use Blogger with your custom domain for free blog hosting.
- Customize your food blog: Choose a Blogger template, create a logo and make your blog look awesome.
- Adding content on your blog: Start publishing amazing articles, images and videos.
- Promote your blog: Once your blog is ready with some content, start promoting via forums, social media and also among your friends & family.
Now that you know the basic outline of how to start your FREE food blog, let’s look into each of the steps in detail. ????
Find Your Niche for Food Blogging
Food blogging isn’t a single niche. Instead, it is a collection of several niches: popular world cuisines, vegetarian and non-vegetarian food, country-specific food, local cuisines, sea food, etc. Don’t be a generalist. Pick your own core area for food blogging depending on what you like and your expertise in certain cuisine.
Make sure that you have a vision statement for your blog that explains the reason for your choice of your food blog niche and how your blog will be useful to your potential audience. This vision statement should be your guideline for blogging. You must explore other blogs and also search for keywords related to your area of food blogging. Based on this information, draft a content plan for your food blog and create a list of initial articles to be published.
Find your unique voice to present your articles and blogs in style and stand out of the crowd. Do you want to have an image-oriented blog supported with minimal text? Do you want to create videos rather than writing elaborate articles? Think it over. Don’t forget that your blog must have a unique voice that resonates your personality. It will help your blog stand out and appeal to your audience.
Set Up Your Food Blog for FREE
With a plan for your food blog, it’s time to explore how to start a food blog for free.
Step 1: Pick a domain name for your blog
A domain name is the identity of any website or blog, eg: speckygeek.com. For any professional blog, it is a must to have a domain name. Even though we call it a FREE option, you must spend a few bucks registering a domain name. For a negligible cost, you will have a professional identity that will represent your hard work into food blogging.
Register a domain with Godaddy using their $0.99 .com domain coupon or any coupon that works for you. Just Google for it and you will get the Godaddy coupon which allows new customers to register a .com domain name for a nominal cost.
A domain name allows you to look professional and also have better control over your blog and content. If you don’t have your domain name and the free service that you use shuts down or kicks you out, all your hard work is lost. You don’t want that to happen, right?
Step 2: Create a new Google account (optional)
To keep your personal account separate from your professional work, you can create a new account with Google for your blog. Now, you will have a new Gmail address for your blog and a Google account that you use for all blogging purposes. However, you can use your existing Google account to create a blog as well.
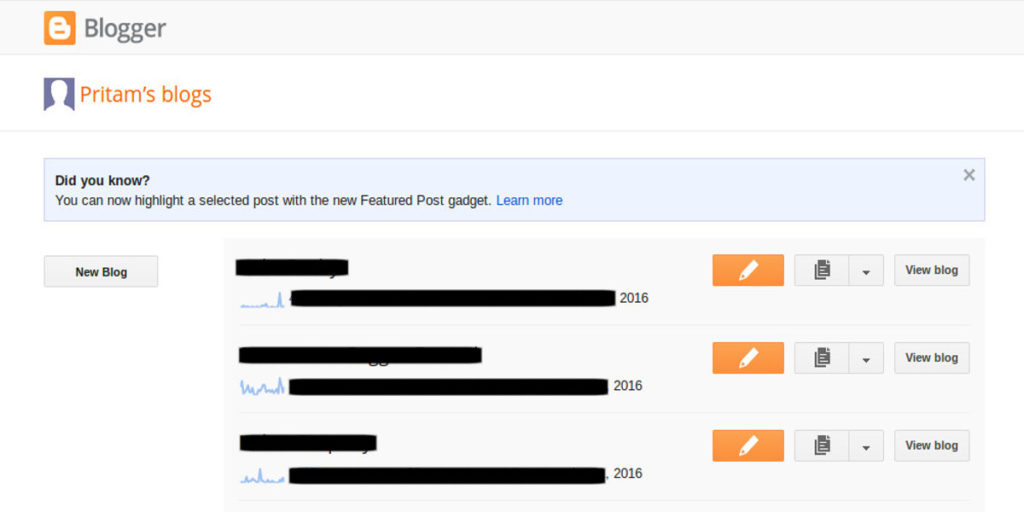
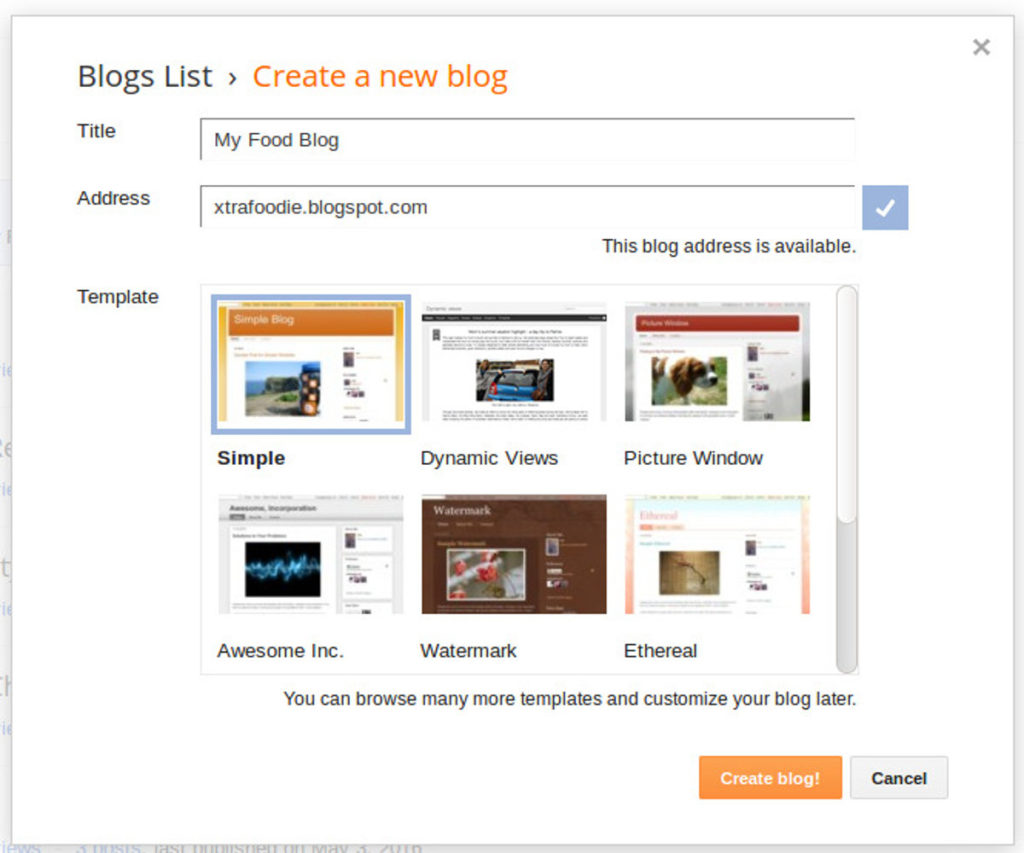
Step 3: Create a blog with Blogger.com
Head over to Blogger.com and create a new blog. Add your blog title and pick your blog subdomain (eg: xtrafoodie.blogspot.com) with Blogger. As we are going to use a custom domain, you need not worry much about getting the right subdomain with Blogger.
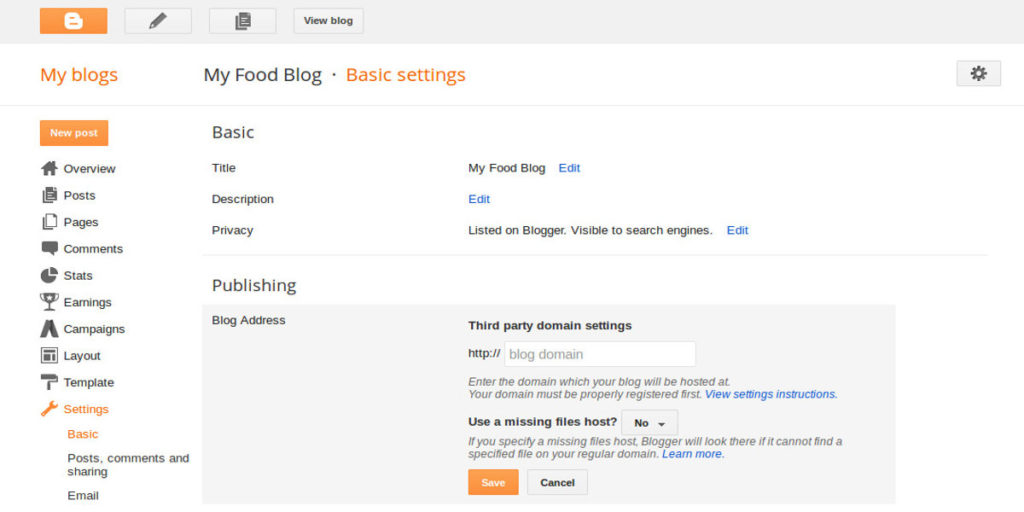
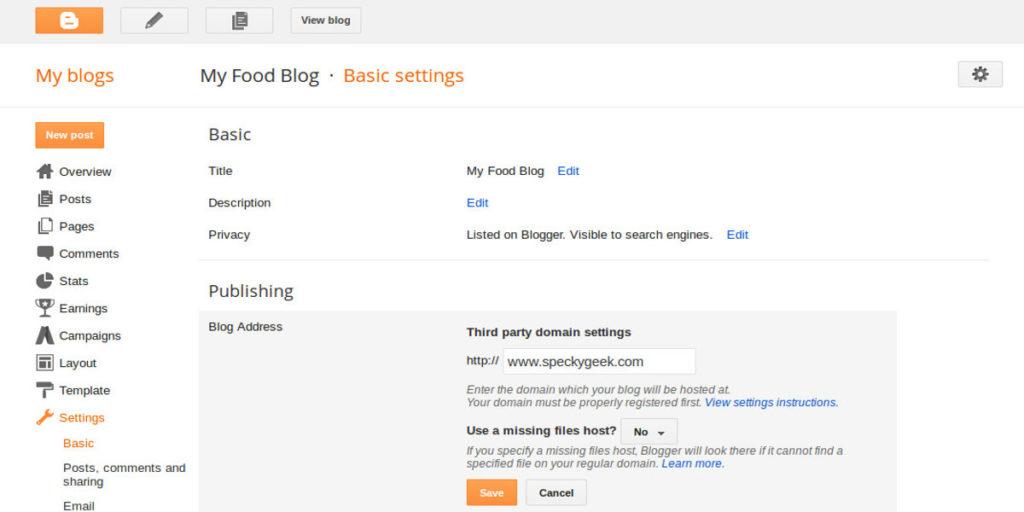
Step 4: Set up a custom domain with Blogger.com blog
Here’s how to set up a custom domain with your Blogger.com blog. If you register your domain with Google, you do not need to worry about adding DNS entries. You can create a blog directly on your Google-registered domain.
- Now, click on your blog link to reach the blog administration dashboard.
- Go to Settings > Basic > Publishing menu in the blog’s Blogger dashboard to link the domain that we have registered for our blog.

- Click on the “+ Setup a 3rd party URL for your blog – Point your own registered URL to your blog” link.
- Enter the blog domain name with www, eg: www.myawesomeblog.com and click Save. (Blogger’s custom domain name option works only with a subdomain such as www.)
- An error message will be displayed with required settings and instructions. Visit your domain registrar’s website and find the DNS (Domain Name System) or the Name Server settings in the control panel. Delete existing CNAME entries.
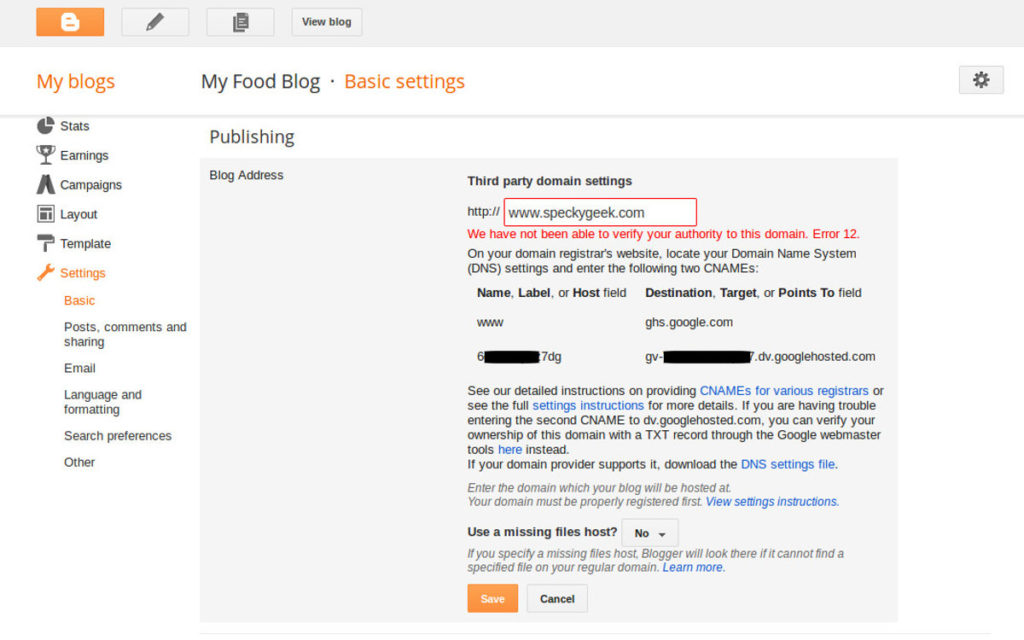
- On your domain registrar’s website, locate your Domain Name System (DNS) settings and enter the following two CNAMEs: (Blogger provides you the details of the CNAMEs required to be added to your blog’s domain name.) Enter the CNAMEs provided in the error message and click Save. You can read the details about CNAMEs on Blogger’s help page.
- If you registered domain with Godaddy, read the instructions on adding a CNAME record in DNS here. For other registrars, see their support section for the right instructions to add the required DNS entries.
- Once you have entered the CNAMEs provided by Blogger, wait for a while for the new CNAMEs to become effective, which may take a few minutes to an hour.
- Go back to Blogger and repeat the same process. If you still see the previous error, try after a while.
- If the CNAMEs have been set up properly, your custom domain will be accepted and your blog will start showing up when you type: www.yourawesomeblog.com in your web browser.
Step 5: Customize Your Blogger Blog
To change the design of your Blogger blog, you can use the template designer or CSS. You can also upload a custom Blogger template. You can find several interesting Blogger templates on the Internet. However, please remain cautious when using such free templates. Download Blogger templates only from reliable sources.
Change the design with the template designer
- Sign in to Blogger.
- Select the blog to update the design.
- In the left menu, click Template.
- Under “Live on blog,” click Customize.
- At the top, use the carousel to choose a template. Below the carousel, use the preview to see how your blog will appear.
- Use the left menu to customize your background, adjust widths, layout, and other settings.
- On the top right, click Apply to Blog to make your changes live.
- To clear your changes, click Live on Blog.
Now, you have your Blogger.com hosted food blog ready. Start publishing awesome content with images and videos. Share it with the world using social media. Try Instagram & Pinterest along with Facebook and Twitter. Learn basics of search engine optimzation to improve the effectiveness of your blog by drawing traffic from search engines such as Google & Bing.
Best of luck with your food blog!